Frontline Embedded Design
Contest - 2008.
Quick Start Guide - High Performance
Embedded Workshop(HEW).
Introduction.
Renesas’s HEW 4.0 is used for developing application programs. Each program is opened as a separate project and the related files are stored in the relevant project directory.
In the HEW, open a new project by selecting New workspace from the main menu.
Select the option “C source startup Application” from Project Types,
M16C option from CPU family and select tool chain as Renesas M16C
standard.
Enter the project name and select the location using Browse button.

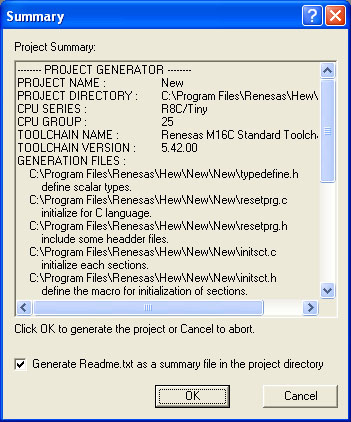
Press OK button. The project generator opens up another screen.
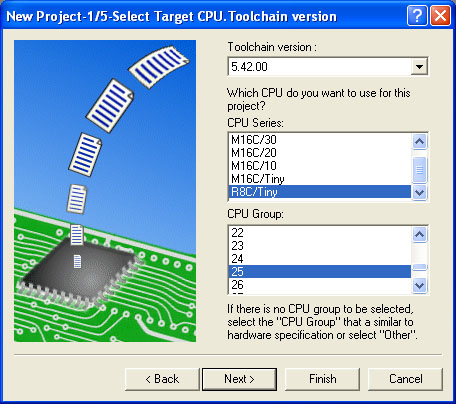
Select R8C/Tiny option from CPU series, 25 from CPU group and press
Next button.
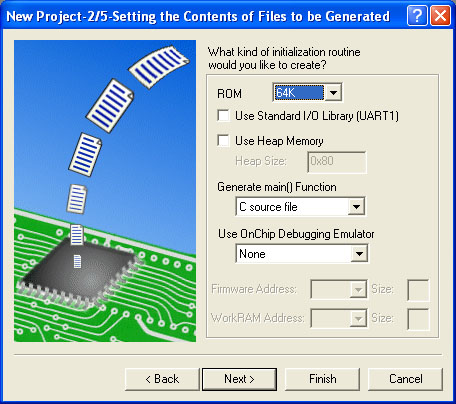
Select the required options and click Next button.For most applications, click
Next button without changing the default options.
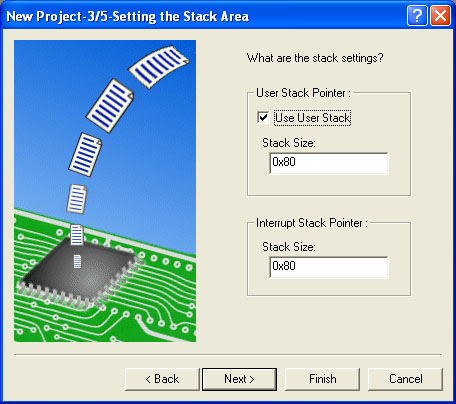
Enter the new stack size or click Next button.
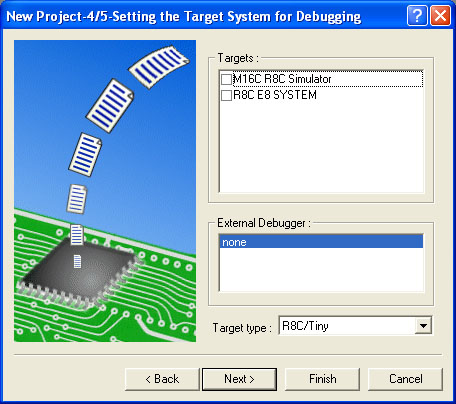
Select M16C R8C Simulator from targets option and click Next button.
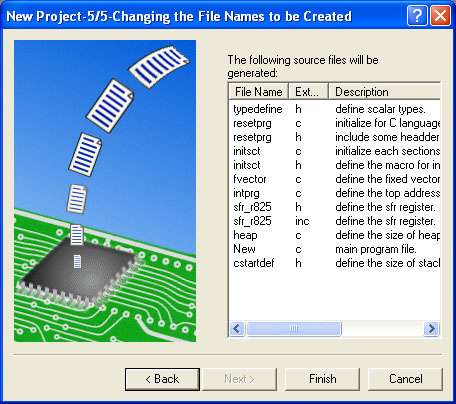
Click Finish button to create the new project.
New.C is the main file. The main ‘C’ file includes the ‘sfr_r825.h’ file. Note that this file defines all the port registers and other registers used by internal peripherals in the form of structures. Hence by including this header file, IO ports and internal peripherals can be accessed easily.
The other c files ‘intprg.c’ and ‘fvector.c’ contains system control functions and interrupt vector addresses.
An example program, compatible with Renesas’s HEW are supplied in the CD as separate project.
The project example, Serial Port is provided in a separate directory with all the relevant files. Hence to get an exact picture of the example, open the project file in the Renesas’s HEW and take a look at the ‘C’ files and the routines.
Either you can compile the files once again to get the output file with .mot extension and program it in the device or simply program the already existing mot file in the ‘debug’ subdirectory of any project to verify it.
Serial Port
Project Name : SerialPort
Serial port 0 is used in the asynchronous mode and a message is transmitted through the port with a baud rate of 9600. The Hyper terminal application of the windows can be opened to receive the message from the tool.
Directory Name : SerialPort
The relevant files like SerialPort.c, SFR_R825.H, etc. are located in the directory SerialPort\SerialPort\’ and the compiler output file,
SerialPort.mot is in the directory ‘SerialPort \SerialPort\Debug\‘
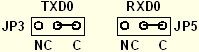
Jumper Settings:
Jumpers help to connect the RXD0 and TXD0 lines of the micon to the serial port connector. Use the jumpers JP3 and JP5 for R8C/25 device.
Function Description:
Serial port 0 is the port available to the user. The serial port is operated in asynchronous mode with a baud rate of 9600. The port is initialized to 8 bit mode with no parity and one stop bit. The clock for the peripheral is obtained from the main oscillator. Internal baud generator is used. Least significant bit in the byte is transmitted first.
Baud Rate is calculated as follows:
BR = Frequency / 16 (n+1)
n = Baudrate generator count
The oscillator frequency divided by 1 option is selected as clock for serial port module.
For 9600 baud, the value of n will be 129.
Transmission:
Transmission is initiated by loading a byte to the transmitter buffer. Before loading a byte to the transmitter buffer, check for the transmitter buffer empty condition. When the buffer is empty, it indicates that the transmission of the previous byte is over and it is ready to accept a new byte. Now you can load a new byte.
Reception:
When the receive buffer is full, it indicates that it has received a byte. The Receive complete (RI) flag can be checked for this operation. When this flag is set to 1, a byte is waiting for you to read. Now you can read the byte from the receive buffer.
Program Flow.
Step 1:
Initialize Micons’ main clock.
a. Turn off ring oscillator
b. Load CM1 register with 68h, which indicates that the main clock is fosc / 2.
Step 2:
Initialize Serial port 0.
a. Select 9600 Baud rate
b. 8 bits data format with no parity and one stop bit
c. Serial port clock foc/1 and LSB first
d. Enable transmission
Step 3:
Transmit Message 1
a. Wait until transmitter buffer is empty. Then send a character from the message 1
b. Repeat this for the entire message 1.
Step 4:
Transmit Message 2
a. Wait until transmitter buffer is empty. Then send a character from the message 2
b. Repeat this for the entire message 2.
c. Halt.
Output:
To receive the message from the serial port, connect a serial port cable between the COMM port of the PC and the Serial Port 0 Connector of the proto board.
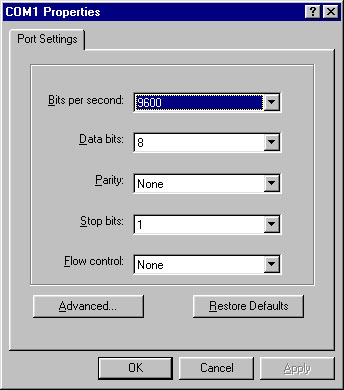
Open the Hyper Terminal application of the windows accessories. Do the settings of the port as shown below:
Now connect the port by giving command as “Call”. Reset the project board and you will get a message on the screen as
“Renesas R8C2X ”
“Proto Board ”.
Download the PDF file of Quick Start Guide to
HEW.
|